The Iconic Shoulder Move Invented by a Legend
When you hear the name “Arnold,” your mind probably jumps straight to images of bulging biceps, broad shoulders, and an iconic Austrian accent. But Arnold Schwarzenegger didn’t just inspire the world with his physique—he actually invented exercises to help others get there. One of the most famous? The Arnold Press.
This unique twist on the classic dumbbell shoulder press is a shoulder-builder like no other. Whether you’re a beginner looking to strengthen your delts or a seasoned gym-goer trying to break through a plateau, the Arnold Press could be the missing piece in your training.
What Is the Arnold Press?
The Arnold Press is a compound shoulder exercise designed to target all three heads of the deltoid muscle—front (anterior), side (lateral), and rear (posterior). Created and popularized by Schwarzenegger himself, this move begins with your palms facing your body and rotates them as you press overhead.
This movement not only engages more muscle fibers but also promotes shoulder stability and greater time under tension.
Arnold Press vs. Regular Shoulder Press: What’s the Difference?
The key difference lies in the range of motion and rotation. In a regular dumbbell shoulder press, your palms face forward throughout the movement. The Arnold Press adds a pronation twist, which:
Increases muscle activation, especially in the front and side delts
Promotes joint mobility through rotation
Places more time under tension during the lift
This seemingly small change makes a big difference in results.
Muscles Worked
The Arnold Press is a full-spectrum shoulder movement. Here's a breakdown of what it hits:
Anterior deltoid (front) – heavily engaged during the initial phase
Lateral deltoid (side) – stabilizes and lifts during the press
Posterior deltoid (rear) – works to stabilize and control the rotation
Trapezius and upper back – assist in shoulder stabilization
Triceps brachii – extend the arms during the overhead press
Rotator cuff muscles – work to stabilize the joint through rotation
Benefits of the Arnold Press
Here’s why the Arnold Press deserves a spot in your shoulder day:
1. Targets All Three Deltoid Heads
Unlike many shoulder exercises that focus primarily on one area, the Arnold Press evenly distributes work across the entire shoulder.
2. Improves Shoulder Mobility
The rotation helps open up your shoulder joints, encouraging a healthy range of motion.
3. Builds Better Aesthetics
Broader shoulders and rounder delts improve your physique and give that V-taper look everyone wants.
4. Functional Strength
By mimicking real-world movement patterns, the Arnold Press builds strength that's transferable to sports and daily activities.
5. Time Under Tension
The longer motion pathway means your muscles are working harder—leading to greater growth.
How to Perform the Arnold Press (Step-by-Step)?
Start PositionSit or stand with dumbbells held at shoulder height, palms facing your body, elbows in front of you.
Rotate as You PressAs you press the dumbbells overhead, rotate your palms outward so they face forward at the top of the movement.
Lock Out and ControlFully extend your arms overhead, pause briefly, then lower the dumbbells slowly, reversing the rotation.
Back to StartReturn to the starting position with palms facing in and elbows forward.
Common Mistakes to Avoid
Even a legendary lift like the Arnold Press can become ineffective—or even dangerous—if done incorrectly. Here’s what to watch out for:
Overarching the Lower Back
Engage your core to prevent leaning backward as the weights go up.
Going Too Heavy
Start with lighter weights to master the rotation and protect your rotator cuff.
Rushed Reps
Speeding through the press sacrifices muscle engagement. Slow it down.
Incomplete Range of Motion
Don’t skip the twist—it’s what makes the Arnold Press so effective.
Pro Tips from Trainers
Warm up your rotator cuff before pressing to prevent injury.
Combine Arnold Press with lateral raises for complete shoulder development.
Include it early in your workout while your energy levels are high.
Use a mirror to check your form and ensure the rotation is clean.
Don’t lock your elbows aggressively at the top—keep tension on the delts.
How Often Should You Do It?
If shoulders are your weak point or a focus area, aim for 2 times per week with at least 48 hours of rest between sessions.
A solid rep scheme:3–4 sets of 8–12 reps using moderate weight and perfect form.
Sample Arnold Press Workout
Exercise
Sets
Reps
Arnold Press
4
10
Dumbbell Lateral Raise
3
12
Face Pulls
3
15
Upright Rows
3
10
Shrugs
2
12–15
The Arnold Press Is a Shoulder Day Essential
The Arnold Press isn't just a fancy name—it’s a tried-and-tested exercise that’s stood the test of time. Whether you're chasing better symmetry, added size, or functional strength, this press is a powerful tool in your arsenal.
It’s smart. It’s effective. And most importantly—it’s Arnold-approved.
Still Not Seeing Results? Time to Flip Your Shoulder Routine Upside Down
If you've been hitting your shoulder workouts hard but still feel like something’s missing — maybe your delts aren’t popping, your strength isn’t progressing, or your pump fades too quickly — then it's time to rethink your approach.
Let’s talk about a game-changing method: Pre-Exhaustion Training.
In this blog, we’ll break down what pre-exhaustion really is, how to apply it to your shoulder workouts, the science behind it, pros and cons, a sample routine, and tips to make the most out of it. Whether you're a seasoned gym-goer or a passionate beginner, this strategy could be the key to unlocking your shoulder growth.
What is Pre-Exhaustion Training?
Pre-exhaustion is a technique where you perform an isolation exercise to fatigue a specific muscle group before moving on to a compound movement.
In simpler terms: You tire out the target muscle before hitting it with a heavier, multi-joint lift.
When it comes to shoulders, that means doing something like lateral raises or front raises before a barbell overhead press or Arnold press.
Why Use Pre-Exhaustion for Shoulder Workouts?
The shoulders are a complex muscle group made up of three heads — anterior (front), lateral (side), and posterior (rear). When doing compound lifts like overhead presses, your triceps or upper chest often take over, limiting the activation of your delts.
Pre-exhaustion solves this.
It ensures your delts are already working at high capacity before you bring in other muscles. This enhances:
Mind-muscle connection
Muscle activation
Pump and fatigue
Growth and hypertrophy
Benefits of Pre-Exhaustion in Shoulder Training
Greater Muscle IsolationBy fatiguing the delts first, compound lifts hit them harder since supporting muscles take over late in the set.
Improved Muscle Growth (Hypertrophy)Training a fatigued muscle forces it to recruit more motor units, enhancing muscle fiber recruitment and triggering hypertrophy.
Enhanced Mind-Muscle ConnectionStarting with isolation exercises helps you mentally connect with the muscle you want to grow. You feel the burn exactly where you should.
Better Symmetry and ShapePre-exhausting individual heads of the deltoid (especially the often-neglected rear delts) ensures balanced development.
Efficient TrainingGreat for those short on time — pre-exhaustion gets you a massive burn in fewer sets.
Downsides to Consider
Reduced Strength Output
You may lift lighter during compound lifts. That’s okay — the goal here is hypertrophy, not max strength.
Not Ideal for Beginners
If you’re still building basic form and strength, you need to master compound movements first.
Risk of Overtraining
Because this method is intense, overdoing it can fatigue the CNS if not programmed smartly.
The Science Behind Pre-Exhaustion
Research shows that muscle fiber recruitment increases when a muscle is pre-fatigued before a compound lift. In a 2017 study published in the Journal of Strength and Conditioning Research, participants who performed isolation exercises before compound lifts experienced greater muscle activation in the targeted area (in this case, the deltoids).
However, the same study showed decreased performance in strength-based outcomes — which further supports that this method is best suited for hypertrophy-focused training, not powerlifting or max lifts.
How to Structure a Shoulder Workout with Pre-Exhaustion?
Here’s a sample plan using pre-exhaustion for well-rounded shoulder development:
Day: Pre-Exhaust Shoulder Hypertrophy Routine
Phase 1: Pre-Exhaust Isolation
Dumbbell Lateral Raise – 4 sets x 15-20 repsFocus on slow tempo, pause at the top. Target the medial delts.
Seated Front Raise (Alternating) – 3 sets x 12-15 repsTarget the front delts with strict form. Use a light to moderate weight.
Phase 2: Compound Lifts
Overhead Barbell Press (Seated or Standing) – 4 sets x 8-10 repsGo moderate on weight. You’ll be surprised how challenging this feels post-raises.
Arnold Press – 3 sets x 10-12 repsExcellent for full shoulder activation, including the front and medial heads.
Phase 3: Finishers (Rear Delt Focus)
Reverse Pec Deck Flys – 3 sets x 15-20 repsIsolate rear delts — the most ignored muscle in shoulder day.
Face Pulls (Rope on Cable Machine) – 3 sets x 15-20 repsGreat for posture, shoulder health, and rear delt development.
Important Tips for Pre-Exhaust Shoulder Training
Control Every Rep: Don’t rush isolation exercises. The goal is to fully fatigue the muscle.
Choose Proper Weights: You’re not chasing PRs in compound lifts here. Focus on the feel.
Recovery is Key: Don’t do this method more than once or twice a week. Shoulders need time to repair.
Watch Your Form: When muscles are fatigued, form tends to break down — focus is crucial.
Warm-Up Thoroughly: Shoulder joints are delicate. Mobilize and activate before going heavy.
Who Should Try This?
Bodybuilders looking for better definition and pump.
Intermediate to advanced lifters stuck in a plateau.
Lifters with lagging delts wanting to bring up their shoulders.
Anyone who wants variety and a new challenge in their shoulder day.
Burn Smart, Not Just Heavy
Pre-exhaustion isn’t just a “fancy technique” — it’s a serious weapon in your training arsenal when applied strategically. By starting with isolation exercises to pre-fatigue your delts, you ensure your compound lifts become shoulder-focused, rather than turning into triceps or chest-dominant movements.
And the best part? The pump you feel is insane. Your shoulders will feel like they’re on fire — in the best way.
So next time you're planning your shoulder workout, don’t just go straight into presses. Flip the script. Pre-exhaust. And watch your results level up.
Master This Powerful Lower Body Move
Leg day—some love it, some dread it—but there’s no doubt that training your legs is essential for building a strong, balanced, and powerful physique. Among the various machines and exercises available in the gym, the seated leg press remains a favorite for many lifters. Why? Because it delivers serious results without putting too much strain on your back or requiring Olympic-level coordination.
Whether you're new to the gym or a seasoned lifter looking to refine your form, this guide will walk you through everything you need to know about leg training on a seated leg press.
What Is a Seated Leg Press?
The seated leg press is a resistance training machine designed to target your quads, hamstrings, glutes, and calves. Unlike free weight squats or lunges, it allows you to push weight with your legs while seated, reducing the pressure on your spine.
In this machine, you sit on a padded seat, place your feet on a platform, and push the platform away from your body using your legs.
The beauty of the seated leg press lies in its ability to hit multiple major leg muscles at once:
Muscle Group
Primary Function
Quadriceps
Straightening the knee
Gluteus Maximus
Hip extension (pushing through)
Hamstrings
Assists in hip and knee movement
Calves (Gastrocnemius & Soleus)
Stabilization and support
Benefits of Seated Leg Press
Here’s why this machine deserves a spot in your leg day routine:
1. Controlled Motion for Safer Training
You’re seated with back support and a guided path, which makes this machine ideal for beginners or those with lower back issues.
2. Perfect for Building Strength & Size
The leg press lets you load up heavier weights than most free weight leg exercises—great for muscle hypertrophy and strength gains.
3. Reduced Injury Risk
No need to worry about balance or bar positioning. Just focus on your legs and move with intention.
4. Targets Specific Muscles Based on Foot Placement
You can easily adjust your foot position to emphasize different muscles (more on this below).
How to Use the Seated Leg Press Machine Properly?
Here’s a step-by-step guide to using the machine correctly:
Step 1: Set Up the Machine
Adjust the seat distance so your knees are at a 90-degree angle or slightly tighter when your feet are on the platform.
Make sure your back is flat against the pad, and your head is supported.
Step 2: Foot Placement
Place your feet shoulder-width apart on the center of the platform.
Keep heels flat and toes pointing slightly outward.
Step 3: The Movement
Inhale and slowly bend your knees to lower the weight until they form a 90° angle.
Exhale and push through your heels to return to the starting position.
Don’t lock your knees at the top; keep a slight bend.
Step 4: Reps & Sets
Beginners: 3 sets of 12-15 reps (moderate weight)
Intermediate: 3–4 sets of 8-10 reps (progressively heavier)
Advanced: 4–5 sets of 6-8 reps (challenging weight with proper form)
Common Mistakes to Avoid
Even with machines, bad form can lead to injury or reduced effectiveness. Watch out for these mistakes:
Mistake
Why It's a Problem
Knees caving inward
Can strain knee ligaments
Lifting your heels
Shifts focus from glutes to knees
Rounding your lower back
Can lead to lumbar spine injury
Locking out knees
Increases injury risk
Going too fast
Reduces tension on muscles
Variations Based on Foot Position
Want to target specific muscles more directly? Try adjusting your foot position:
Foot Placement
Target Area
High on platform
Glutes & Hamstrings
Low on platform
Quads
Wide stance
Inner thighs (Adductors)
Narrow stance
Outer quads
Pro Tips for Maximum Results
Want to make the most of your seated leg press sessions? Keep these tips in mind:
Mind-Muscle Connection: Focus on engaging your leg muscles, not just moving the weight.
Use Full Range of Motion: Don’t cut reps short; lowering fully increases muscle activation.
Keep a Training Log: Track weights and reps to measure progress over time.
Progressive Overload: Gradually increase weight or reps weekly to challenge your muscles.
Pair It Smart: Combine with lunges, step-ups, or Romanian deadlifts for a killer leg day.
Seated Leg Press vs Squats: Which Is Better?
Both exercises have their place. If you're working on leg development but want to reduce spinal loading, seated leg press is your go-to. But if you're chasing overall functional strength and athleticism, squats still reign supreme.
Why not both? Alternate between the two for a balanced leg training program.
The seated leg press is more than just a machine in the corner of your gym—it’s a powerful tool to grow stronger, more muscular legs with minimal risk. Whether you're aiming to build size, strength, or improve muscle symmetry, this machine delivers when used with proper form and intent.
It’s not just about pushing weight—it's about pushing yourself. Master the movement, stay consistent, and the gains will follow.
Why Triceps Were a Big Deal in the Golden Era of Bodybuilding
In the golden era of bodybuilding, where legends like Arnold Schwarzenegger and Franco Columbu ruled the gym, one muscle stood out just as much as the biceps—the triceps. These three-headed muscles make up nearly two-thirds of your upper arm size, yet they often don’t get the attention they deserve in modern training routines.
But old-school bodybuilders knew better. They trained triceps hard, heavy, and smart—with minimal equipment and maximum intent.
Understanding the 3 Parts of the Triceps
The triceps brachii is composed of three distinct muscle heads: the long head, lateral head, and medial head. Each plays a unique role in extending the arm at the elbow, but they vary in size, placement, and activation depending on arm position and movement.
1. The Long Head
The long head is the largest portion of the triceps. It originates from the scapula and runs down the back of your arm, giving your triceps depth and thickness when viewed from the side. What makes it unique is that it crosses the shoulder joint, meaning it plays a role in both elbow and shoulder extension. Because of this, exercises that involve overhead movement are best for targeting the long head.
2. The Lateral Head
This is the “show muscle” of the triceps—the outer part that gives your upper arm that wide, horseshoe-shaped look. It’s most activated during pushing movements with a neutral or overhand grip. While it doesn’t cross the shoulder joint like the long head, it responds well to moderate-to-heavy loads and explosive contractions.
3. The Medial Head
Often overlooked due to its less visible placement, the medial head lies underneath the other two heads and is essential for elbow stability and full-range extension. It kicks in most during lockout movements and close-grip work, especially when using a reverse grip or strict isolation.
How Golden Era Bodybuilders Trained Triceps?
Back in the 60s and 70s, bodybuilders didn’t have modern cable machines with perfect angles or resistance bands for “constant tension.” They relied on barbells, dumbbells, benches, and pulley stacks—basic tools used with brilliant precision.
They also understood muscle anatomy deeply. To fully develop the triceps, they targeted each head deliberately through exercise selection and used high-volume, multi-angle routines to ensure no part of the muscle was left behind.
Let’s explore how these legends trained each part.
Training the Long Head: Overhead is Key
Because the long head stretches across the shoulder joint, overhead movements are essential. One of the most effective exercises from the old-school playbook is the Seated Overhead Dumbbell Extension. Using a single dumbbell held with both hands, this movement allows you to get a deep stretch at the bottom and a powerful contraction at the top.
Arnold famously used the Incline Overhead EZ-Bar Extension to emphasize the long head even more. By performing the move on an incline bench, he was able to increase the range of motion and stretch, which is critical for hypertrophy.
Another classic method was the Dumbbell Pullover paired with narrow grip bench presses in a superset. The pullover stretches the long head while the bench press hits all three heads, giving your arms a massive pump and stretch in one go.
Targeting the Lateral Head: Lockouts and Pushes
The lateral head thrives on straight-arm pushing exercises with moderate to heavy weights. Close-grip bench presses were a staple of many old-school routines. By narrowing the grip and keeping the elbows tucked, the emphasis shifts to the outer triceps.
Cable pushdowns were also used, but back then, the technique was strict—no swinging, no momentum. Lifters would often perform up to 20 reps per set, focusing on a strong contraction and full range of motion. They knew that locking out with control was key to stimulating growth in the lateral head.
Parallel bar dips were another secret weapon. Unlike chest dips which use a forward lean, keeping the torso upright while dipping focuses the load on the triceps. Adding weight with a belt or holding a dumbbell between the feet made the movement even more effective. This was often done at the beginning of the workout to pre-fatigue the muscle.
Medial Head: Isolation and High Volume
Since the medial head is hidden beneath the other two, it’s best targeted with strict, controlled movements. One underrated old-school favorite was the Reverse Grip Pushdown. By flipping the grip underhand, the medial head is forced to fire more, especially during the lockout phase.
Another technique was high-rep Kickbacks with dumbbells. Done with light to moderate weight, kickbacks engage the medial head when the elbow is kept stationary and the arm is extended fully. The focus wasn’t on how heavy the weight was, but how well the lifter could isolate the muscle without using momentum.
For advanced lifters, the JM Press—a hybrid between a close-grip bench and a skull crusher—was used to overload both the medial and lateral heads. It’s a complex move, but incredibly effective when done right.
Building Your Old-School Triceps Routine
If you want to train like a golden-era legend, you need more than just a few random sets. These athletes trained with purpose, structure, and variety.
A typical triceps workout would include 3–4 exercises, covering all three heads. For example:
Start with compound work like close-grip bench presses or weighted dips to activate all heads and build foundational strength. Then, move into overhead extensions to hit the long head hard while your energy is still high. Follow that with isolation work such as pushdowns or kickbacks to burn out the muscle with higher reps.
Reps usually ranged from 6–10 for compound lifts and 12–20 for isolation. Rest between sets was short, around 30–60 seconds, to maintain intensity and pump.
Frequency was another key component. Triceps were often trained twice per week—once with chest and again with shoulders—to ensure consistent growth without overtraining.
Workout with Old-School Wisdom
Old-school bodybuilding was all about hard work, intelligent programming, and mastering the basics. Triceps weren’t just an accessory muscle—they were treated with the same seriousness as chest or back. The result? Arms that still inspire awe today.
By understanding the anatomy of the triceps and applying proven techniques from the legends, you can build massive, well-rounded arms without needing fancy equipment or gimmicks.
Start with what worked then, and you’ll build triceps that work now—strong, sculpted, and timeless.
Ready to grow a monster back?
If you're serious about building a strong, wide, and thick back, the T-Bar Row deserves a place in your workout. Known for its simplicity and raw strength appeal, this compound movement has stood the test of time among bodybuilders, powerlifters, and fitness enthusiasts.
In this blog, we’ll dive deep into what T-Bar Rows are, their benefits, how to do them correctly, the muscles they target, common mistakes, variations, and FAQs.
What is a T-Bar Row?
The T-Bar Row is a compound weightlifting exercise that primarily targets the muscles of the back. It involves lifting a loaded barbell anchored at one end, typically using a V-handle or landmine handle attachment. This move requires you to hinge at the hips and pull the weight towards your torso—making it one of the most effective pulling exercises.
It’s named "T-Bar" because the handle forms a T-shape with the barbell.
Muscles Worked
T-Bar Rows are a compound movement, which means they engage multiple muscle groups simultaneously:
Latissimus Dorsi (Lats): The primary muscle targeted, essential for width and thickness.
Rhomboids: Help retract the scapula and improve posture.
Trapezius (Traps): Both upper and lower traps are engaged during the lift.
Erector Spinae: Stabilize your spine throughout the movement.
Rear Deltoids: Aid in pulling the weight back.
Biceps: Assist as secondary movers.
Forearms and Grip: Constantly engaged to hold the handle.
Benefits of T-Bar Rows
1. Incredible Back Thickness
Unlike lat pulldowns or pull-ups that build width, T-Bar Rows help pack on serious back density—especially in the mid-back region.
2. Improves Posture
This exercise strengthens the muscles responsible for keeping your shoulders back and spine aligned.
3. Boosts Pulling Strength
T-Bar Rows transfer well to deadlifts and other pulling movements by enhancing your posterior chain power.
4. Engages Core and Stabilizers
You need a strong and stable core to maintain proper form—giving your abs and lower back an extra challenge.
5. Customizable Load
From plates to grip handles, T-Bar Rows offer lots of ways to adjust resistance, intensity, and hand position.
How to Do T-Bar Rows (Step-by-Step)
Setup:
Load one end of a barbell and secure the other end in a landmine attachment or corner.
Straddle the bar with your feet shoulder-width apart.
Bend at the hips until your torso is about 45 degrees to the floor.
Grab the V-handle or T-Bar grip attachment under the bar.
Execution:
Engage your core and keep a neutral spine.
Pull the weight toward your chest by retracting your shoulder blades.
Squeeze your lats at the top of the movement.
Lower the weight slowly with control.
Repeat for the desired number of reps.
Form Tips:
Don’t round your lower back.
Avoid jerking or using momentum.
Keep your elbows close to your body.
Common Mistakes to Avoid
Rounding the Back
One of the most dangerous mistakes. Always maintain a flat, neutral spine.
Using Too Much Weight
Going too heavy compromises form and shifts the workload from the back to the arms and lower back.
Shrugging Shoulders
Focus on pulling with your elbows, not your traps.
Short Range of Motion
Half-reps limit the effectiveness. Pull all the way to your chest and lower fully for a full stretch.
T-Bar Row Variations
To keep your workouts fresh and hit different muscle fibers, try these variations:
1. Chest-Supported T-Bar Row
Involves a dedicated T-Bar Row machine with a chest pad for back isolation and reduced lower back strain.
2. Single-Arm T-Bar Row
Improves unilateral strength and corrects muscle imbalances. Great for improving mind-muscle connection.
3. Wide-Grip T-Bar Row
Targets the upper lats and rear delts more intensely.
4. Underhand Grip T-Bar Row
Emphasizes the lower lats and engages the biceps more.
T-Bar Rows vs. Other Rowing Exercises
Exercise
Primary Focus
Lower Back Load
Equipment Needed
T-Bar Row
Mid-back, lats, rhomboids
Moderate
Barbell + Landmine/V-Grip
Bent-Over Barbell Row
Full back, traps
High
Barbell
Seated Cable Row
Mid-back
Low
Cable machine
Dumbbell Row
Lats, flexibility
Low
Dumbbells
T-Bar Rows offer a balanced mix of safety, challenge, and effectiveness—making them ideal for most lifters.
Why T-Bar Rows Deserve Your Attention?
T-Bar Rows are more than just an old-school gym move—they're a powerful tool for building a thick, strong, and aesthetic back. By working multiple muscles, improving posture, and strengthening your posterior chain, this movement should be a staple in your back day routine.
Whether you're a beginner aiming for strength or a seasoned lifter sculpting detail, the T-Bar Row will not disappoint—if done right.
FAQs on T-Bar Rows
Are T-Bar Rows better than Barbell Rows?
It depends. T-Bar Rows are often easier on the lower back and allow for better isolation of the mid-back muscles.
Can beginners do T-Bar Rows?
Absolutely. Just start light, use correct form, and consider chest-supported variations if lower back strength is lacking.
How often should I do T-Bar Rows?
1–2 times a week is ideal for most people, depending on your training split.
What if I don’t have a T-Bar Row machine?
Use a barbell in a corner or landmine attachment, and a V-handle for grip.
Want to supercharge your deadlift training?
Deadlifts are the king of compound lifts. They work multiple muscle groups, build real-world strength, and challenge your mental grit. Whether you’re a beginner looking to master form or an experienced lifter aiming to break through plateaus, learning the top deadlift variations can skyrocket your progress.
In this detailed guide, we’ll break down:
What makes the deadlift a must-do movement
The top deadlift variations and their target muscles
Benefits of incorporating multiple deadlifts
Common form mistakes to avoid
Tips to improve your deadlift game
Why Deadlifts Deserve a Spot in Every Workout Plan?
Before we dive into the variations, let’s understand why deadlifts are essential:
Full-body activation: Hits glutes, hamstrings, back, traps, core, and forearms.
Real-life application: Mimics lifting objects off the ground—functional strength.
Posture improvement: Strengthens the posterior chain, reducing lower back issues.
Hormonal response: Triggers a major anabolic response, aiding muscle growth.
The Top Deadlift Variations You Should Try
Each deadlift variation has a unique focus. Depending on your goals—whether it’s hypertrophy, strength, or rehab—there’s a perfect version for you.
1. Conventional Deadlift
Primary focus: Hamstrings, glutes, lower back
This is the classic version you see in most strength programs.
How to do it:Feet shoulder-width apart, grip the bar just outside the knees, keep the spine neutral, drive through the heels, and pull the bar close to your shins.
Best for: Overall strength and beginner lifters
Avoid if: You have limited hamstring flexibility or lower back issues
2. Sumo Deadlift
Primary focus: Inner thighs (adductors), glutes, quads
This version uses a wider stance and more upright torso position.
How to do it:Feet wide, toes slightly pointed out, hands grip inside the knees. Push knees out, keep chest up, and drive through the hips.
Best for: Lifters with long torsos or back issues
Avoid if: You have poor hip mobility
3. Romanian Deadlift (RDL)
Primary focus: Hamstrings and glutes (hip hinge emphasis)
Perfect for increasing hamstring mobility and strength.
How to do it:Start from a standing position, hinge at the hips while keeping legs slightly bent, lower the bar just past your knees, and then return to standing.
Best for: Muscle hypertrophy and athletic performance
Avoid if: You can’t maintain a neutral spine
4. Trap Bar Deadlift (Hex Bar)
Primary focus: Quads, glutes, traps
Easier on the lower back and better for beginners or injury rehab.
How to do it:Stand inside the hex bar, grab the handles, and lift while keeping your torso upright.
Best for: Athletes and general fitness training
Avoid if: You don't have access to a trap bar
5. Deficit Deadlift
Primary focus: Hamstrings, glutes, lower back (range of motion booster)
A variation where you stand on an elevated platform, increasing the pull distance.
Best for: Improving strength off the floor
Avoid if: You struggle with mobility or spinal alignment
6. Snatch-Grip Deadlift
Primary focus: Upper back, traps, glutes
Hands are placed wider (like an Olympic snatch), creating a longer pull and targeting the upper back.
Best for: Explosive power and upper back strength
Avoid if: You lack shoulder mobility or grip strength
7. Stiff-Leg Deadlift
Primary focus: Hamstrings
Similar to RDL but with less knee bend and more stretch.
Best for: Hamstring hypertrophy
Avoid if: You can’t maintain tension in the posterior chain
8. Block Pulls / Rack Pulls
Primary focus: Lockout strength, traps, and glutes
Bar starts elevated, reducing range of motion and placing focus on top-end strength.
Best for: Building lockout strength
Avoid if: You’re trying to strengthen your bottom position
Benefits of Including Multiple Deadlift Variations
Mixing deadlift types isn’t just for variety—it’s for performance and injury prevention.
1. Correct Weak Points
Struggling with lockout? Try block pulls. Trouble off the floor? Add deficit deadlifts.
2. Prevent Overuse Injuries
Rotating variations reduces repetitive strain and lets different muscle groups recover.
3. Improve Athletic Performance
Trap bar deadlifts improve vertical jump and sprinting power due to quad activation.
4. Better Hypertrophy
RDLs and stiff-leg deadlifts isolate muscles better for hypertrophy vs. conventional deadlifts.
Common Deadlift Mistakes to Avoid
No matter which variation you choose, form is king.
Rounding the back: Keep your spine neutral throughout the lift.
Bar too far from the body: The bar should stay close—almost scraping your shins.
Not locking out: Fully extend the hips at the top.
Too much weight too soon: Start light and master the technique.
Tips to Maximize Your Deadlift Gains
Warm up properly: Include dynamic stretches and hip mobility drills.
Use chalk or straps: For better grip on heavy sets.
Strengthen your core: Deadlift strength depends on a stable core.
Train posterior chain: Exercises like glute bridges, GHRs, and back extensions support deadlifts.
Film yourself: Fixing your form becomes easier when you can see what’s going wrong.
How Often Should You Deadlift?
It depends on your goals:
Goal
Frequency
Strength (e.g., powerlifting)
1-2x/week
Hypertrophy
1-2x/week (higher volume, lighter weight)
General fitness
1x/week
Athletic performance
1x/week, focus on trap bar or sumo
Which Deadlift Is Right for You?
There’s no one-size-fits-all. Each deadlift variation serves a purpose. If you’re a beginner, start with trap bar or conventional. If you're chasing muscle growth, bring in RDLs and stiff-leg deadlifts. If you’re building power, sumo and deficit lifts are your best friends.
Most importantly, always focus on proper form, progressive overload, and recovery. Your deadlift will thank you—and so will your gains.
Rich Gaspari shares in this segment of Old School Training Techniques how a two armed dumbbell row can be used to increase the thickness in your back and arms.
Moving slowly through a workout is incredibly beneficial and helps you maximize the energy you put into every workout. Rich demonstrates here the proper way to do a two armed dumbbell row for increasing your thickness. When combined with our other training techniques, prepare to see the difference!
Why Sumo Squats Deserve a Spot in Your Lower Body Workout Routine?
When it comes to lower body workouts, squats are often a go-to exercise, but have you ever tried the sumo squat? This variation targets the hips, glutes, and inner thighs, making it a fantastic addition to your workout routine.
Whether you're aiming for better mobility, building strength, or simply looking for variety in your leg day exercises, sumo squats can deliver incredible benefits. In this guide, we'll walk you through the essential details about sumo squats, from their benefits to how you should perform them correctly.
What Are Sumo Squats?
Sumo squats are a variation of the traditional squat, with a key difference: the stance. In a sumo squat, your feet are placed wider than shoulder-width apart, and your toes point outward at a 45-degree angle. This stance mimics the foot positioning of sumo wrestlers (hence the name), and it changes the way the muscles in your legs and glutes are engaged during the movement.
Unlike the regular squat, which primarily focuses on the quadriceps and glutes, sumo squats place more emphasis on the inner thighs (adductors), hamstrings, and glutes, making them a great exercise for improving overall leg strength and targeting often-neglected muscle groups.
Benefits of Sumo Squats
Incorporating sumo squats into your workout routine offers a variety of benefits. Here’s why you should consider adding them:
1. Improves Leg Strength
Sumo squats effectively target key muscle groups such as the glutes, quads, hamstrings, and inner thighs. By engaging more muscles than a regular squat, they help improve your overall leg strength, contributing to better performance in other leg exercises and physical activities.
2. Targets the Inner Thighs
One of the primary benefits of sumo squats is their ability to target the inner thighs. By placing your feet wider apart and angling your toes outward, sumo squats engage the adductors (inner thigh muscles) more than regular squats, making them a great exercise for toning this area.
3. Enhanced Hip Mobility
Performing sumo squats regularly can improve hip mobility due to the wide stance. This can be beneficial for athletes or anyone looking to enhance flexibility and range of motion in the hips, which is crucial for various sports and activities.
4. Better Posture
When done with proper form, sumo squats engage your core, helping you maintain balance and stability throughout the movement. This can lead to better posture over time, as your body learns to activate the right muscles to support your spine.
5. Increased Glute Activation
Sumo squats engage the glutes more than regular squats because of the wider stance and outwardly rotated legs. If you’re looking to build your glutes or enhance their strength, sumo squats can be a key component of your workout routine.
How to Perform a Sumo Squat: Step-by-Step Guide?
Performing a sumo squat with the correct form is crucial to avoid injury and maximize its benefits. Here’s a step-by-step guide to help you get it right:
Step 1: Get into the Starting Position
Stand with your feet wider than shoulder-width apart.
Point your toes outward at a 45-degree angle.
Keep your chest lifted, shoulders back, and core engaged.
Step 2: Lower into the Squat
Initiate the movement by pushing your hips back and bending your knees.
Lower your body down as if you’re sitting into a chair. Keep your back straight and avoid rounding your spine.
Ensure your knees are tracking over your toes, and don’t let them cave inward.
Go as deep as your mobility allows, aiming for your thighs to be parallel to the ground or lower.
Step 3: Return to the Starting Position
Push through your heels and squeeze your glutes to stand back up.
Straighten your legs and return to the starting position while keeping your chest lifted and core engaged.
Step 4: Repeat
Perform the desired number of repetitions while maintaining proper form throughout the set.
Aim for 3-4 sets of 10-15 repetitions.
Common Mistakes to Avoid in Sumo Squats
While sumo squats are a great exercise, many people make mistakes that can hinder their progress or lead to injury. Here are a few common errors to watch out for:
1. Rounding the Back
One of the most common mistakes is rounding the back while lowering into the squat. This can put unnecessary strain on your spine and lead to injury. Focus on keeping your chest lifted and your back straight as you squat.
2. Allowing Knees to Cave In
When performing sumo squats, make sure your knees are tracking in line with your toes. Avoid letting them cave inward, as this can cause strain on your knees and reduce the effectiveness of the exercise.
3. Not Going Low Enough
Many people only perform a partial squat, which reduces the activation of the target muscles. Try to go as deep as you can while maintaining proper form, aiming for your thighs to be parallel to the ground or lower.
4. Lifting Heels
Keeping your heels down is essential for activating the right muscles in your lower body. If you lift your heels during the squat, it shifts the weight forward, which can lead to instability and strain on your knees.
Sumo Squat Variations
To keep your workout routine fresh and challenging, you can incorporate different variations of the sumo squat. Here are a few options to consider:
1. Sumo Squat with Dumbbell/Kettlebell
Hold a dumbbell or kettlebell in front of your body with both hands while performing the sumo squat. This adds resistance to the movement, helping to build strength and muscle.
2. Jumping Sumo Squat
Perform a sumo squat as usual but add a jump as you push yourself back up. This increases the intensity of the exercise and adds a cardiovascular element.
3. Sumo Squat Pulse
After lowering into the squat, perform small pulses at the bottom of the movement for 10-15 reps before returning to the top. This increases time under tension, leading to greater muscle activation.
Incorporating Sumo Squats Into Your Routine
Sumo squats can be incorporated into a variety of workout routines. Here are a few ways to make them part of your fitness plan:
1. Leg Day
Add sumo squats to your leg day routine along with other lower body exercises like lunges, Bulgarian split squats, and deadlifts.
2. Full-Body Workout
Include sumo squats in a full-body workout to target your lower body while working on other muscle groups such as the chest, back, and arms.
3. Core Strengthening
Use sumo squats in a circuit with other core exercises like planks, Russian twists, and leg raises to strengthen your core while working your legs.
Sumo Squats: A Simple Move with Major Strength and Toning Benefits
Sumo squats are a powerful exercise that can help improve your leg strength, build muscle, and enhance mobility. By targeting your glutes, inner thighs, and hamstrings, they offer a great alternative to traditional squats, with the added benefit of toning often-neglected muscle groups. To get the most out of this exercise, ensure that you're performing it with the correct form, and don’t forget to experiment with different variations to keep your workouts challenging and fun. Happy squatting!
Rich Gaspari explains the benefits to combining exercises into your workout to maximize your gains. Here he explains that alternating between triceps into biceps workouts uses the Push/Pull method to get the most out of your arms and help them grow!
Follow along for more Old School Training Techniques
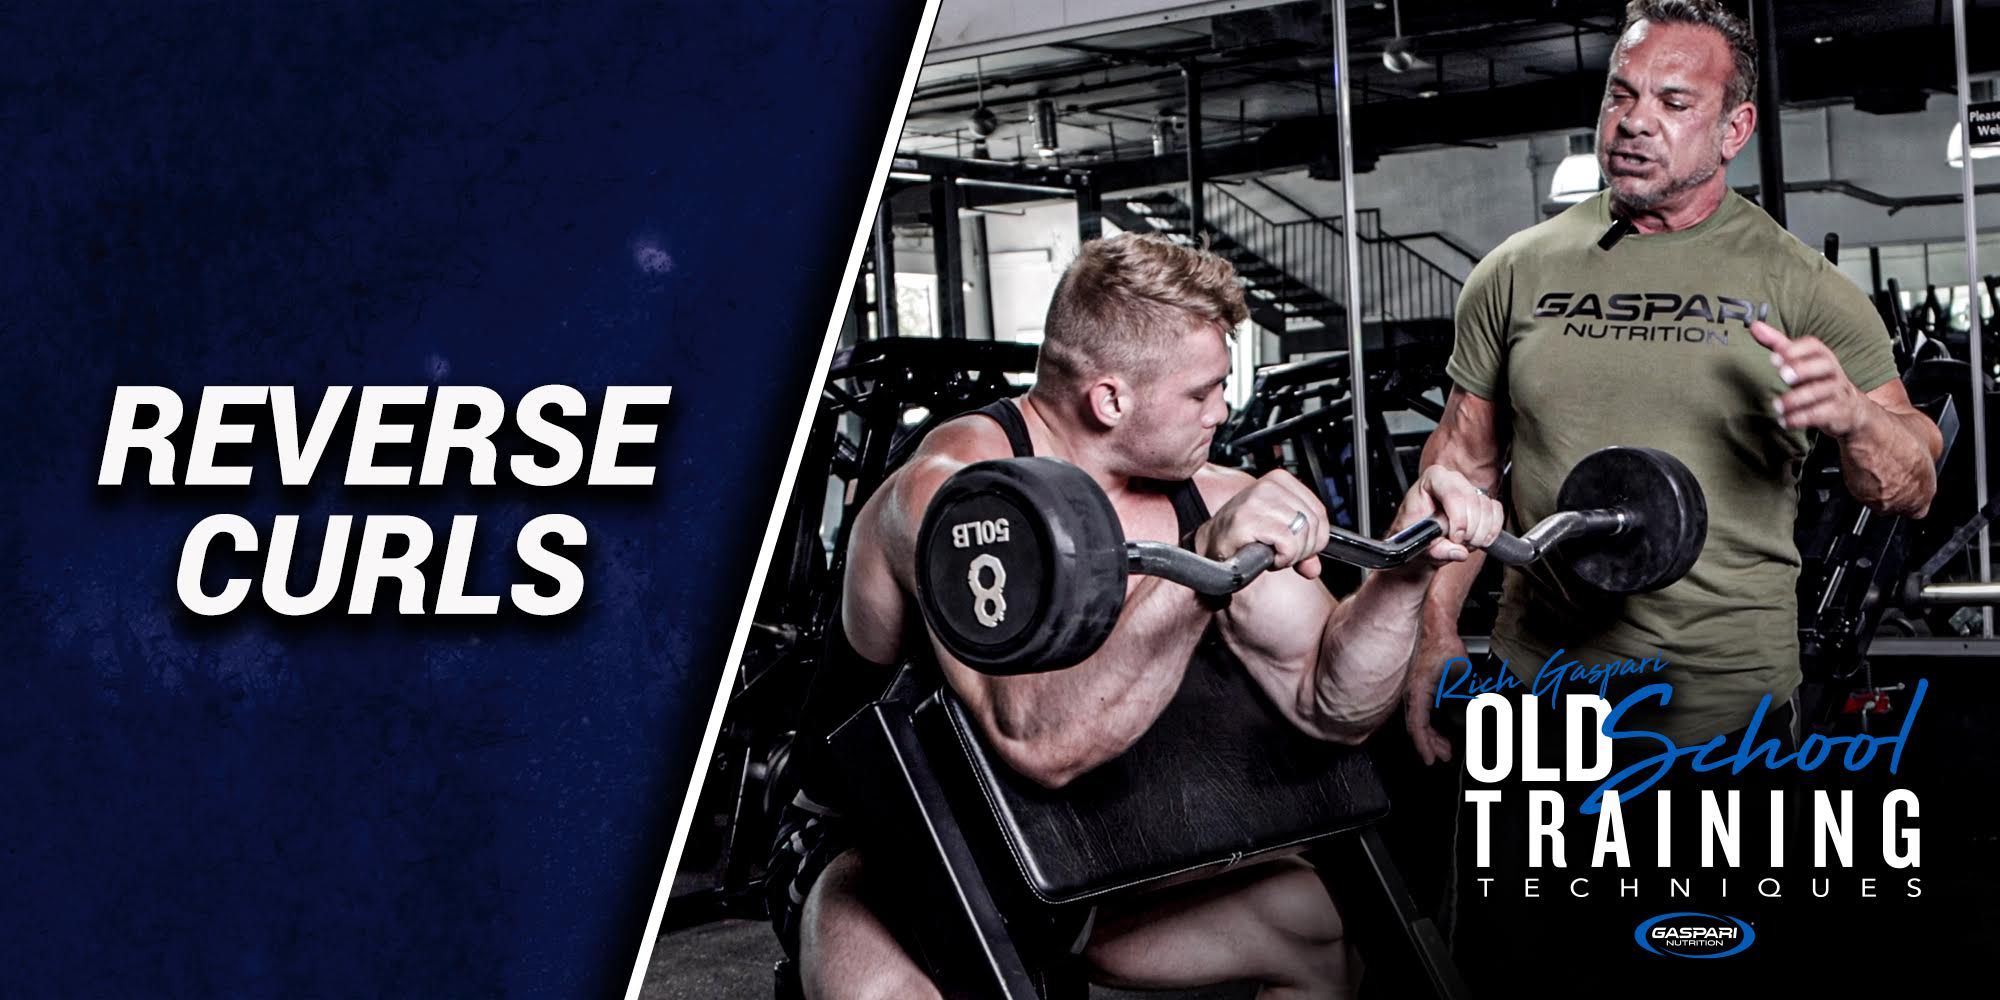
Why Reverse Curls Deserve a Spot in Your Arm Day Routine
Looking to add serious strength and size to your arms? You’ve probably mastered the bicep curl, but have you met its powerful cousin—the Reverse Curl? This simple, yet effective move is often overlooked, but it targets muscles that traditional curls miss. Whether you're a gym rookie or a seasoned lifter, reverse curls deserve a place in your routine.
Let’s break down what makes the reverse curl so effective, how to do it properly, the muscles it targets, and why it's the secret to thicker, stronger arms.
What Is a Reverse Curl?
A reverse curl is a variation of the traditional biceps curl, but with a twist—literally.
Instead of holding the barbell or dumbbells with a supinated grip (palms facing up), you grip it pronated (palms facing down). This small change shifts the focus from the biceps brachii to the brachialis and forearm muscles, making it a killer move for overall arm development.
Muscles Worked in Reverse Curl
What’s unique about reverse curls is their ability to hit muscles that most arm exercises don’t fully engage:
Muscle Group
Role in Reverse Curl
Brachialis
Primary target – adds arm thickness beneath the biceps
Brachioradialis
Forearm muscle, major contributor
Biceps Brachii
Still engaged, but secondary
Wrist Extensors
Stabilization during curl motion
While the biceps steal the spotlight in most arm workouts, the brachialis is the real MVP in reverse curls—this deeper muscle sits underneath your biceps and when developed, it pushes your biceps up, making your arms look even bigger.
How to Perform the Reverse Curl (Step-by-Step)?
You can do reverse curls using a barbell, dumbbells, EZ curl bar, or even a cable machine. Here's how to perform it using a barbell:
Barbell Reverse Curl Instructions:
Start PositionStand upright with feet shoulder-width apart, holding a barbell with a pronated grip (palms facing down), hands shoulder-width apart.
Engage Core and PostureKeep your chest up, elbows tucked into your sides, and wrists neutral (not bent).
Curl UpSlowly curl the barbell towards your shoulders, squeezing your brachialis at the top. Avoid swinging or using momentum.
Lower With ControlLower the weight slowly and under control to the starting position.
RepeatPerform 3–4 sets of 10–12 reps depending on your goal.
Reverse Curl Variations to Try
Want to spice up your routine or work around equipment limitations? Here are some effective variations:
1. EZ Bar Reverse Curl
Less stress on the wrists thanks to the angled grip—perfect for beginners or those with joint issues.
2. Dumbbell Reverse Curl
Great for unilateral training; helps fix imbalances between arms.
3. Cable Reverse Curl
Constant tension from the cable makes this a powerful finisher or pump-focused exercise.
4. Reverse Preacher Curl
Performed on a preacher bench to isolate the brachialis even more—no cheating with body movement here!
Benefits of Reverse Curls
You might be wondering: why not just do regular curls? Here’s what makes reverse curls special:
Builds Thicker Arms
Reverse curls train the brachialis, which lies underneath your biceps. A strong brachialis makes your arms look fuller from every angle.
Improves Forearm Strength
Struggling with grip strength or wrist stability? Reverse curls target the brachioradialis and wrist extensors, making them great for climbers, fighters, and lifters alike.
Enhances Overall Aesthetic
A well-developed brachialis gives your arms a 3D look—more than just a bulging bicep peak.
Reduces Imbalance
Most arm training focuses too much on the biceps brachii. Reverse curls balance your arm development, helping prevent injury and improving joint stability.
Common Mistakes to Avoid
Even though reverse curls look simple, small mistakes can reduce their effectiveness or cause strain:
Using Too Much Weight
Using excessive weight leads to poor form and involves the shoulders or back—defeating the purpose.
Wrist Curling
Letting your wrists bend up or down during the lift puts unnecessary strain on your joints. Keep them neutral.
Elbow Flaring
Your elbows should stay close to your sides. Flaring them reduces tension on your brachialis.
Fast Reps
Slow, controlled movements are key for maximum muscle engagement—especially on the way down (eccentric).
How to Add Reverse Curls to Your Workout?
You don’t need to overhaul your routine to benefit from reverse curls. Here’s how to include them smartly:
Beginner Routine:
3 Sets of 12 reps, post biceps curls or on upper-body day
Intermediate Routine:
Superset reverse curls with hammer curls for maximum brachialis engagement
Arm-Focused Day:
Add reverse curls as the third or fourth movement after standard curls and chin-ups
Pro Tips for Better Results
Warm up your wrists and forearms before heavy sets.
Try fat grip tools or thick bars for added intensity.
Use tempo training (e.g., 2 seconds up, 3 seconds down) to increase time under tension.
Track your grip strength—improvement here means your reverse curls are working!
Don’t Sleep on Reverse Curls
Reverse curls are more than just an accessory movement—they’re a powerful arm builder. By hitting the brachialis and forearms hard, this move helps you create a more balanced, aesthetic, and functionally strong upper body.
So the next time you're planning your arm day, don’t just reach for the preacher curls and hammer curls—throw in a few sets of reverse curls and feel the difference.
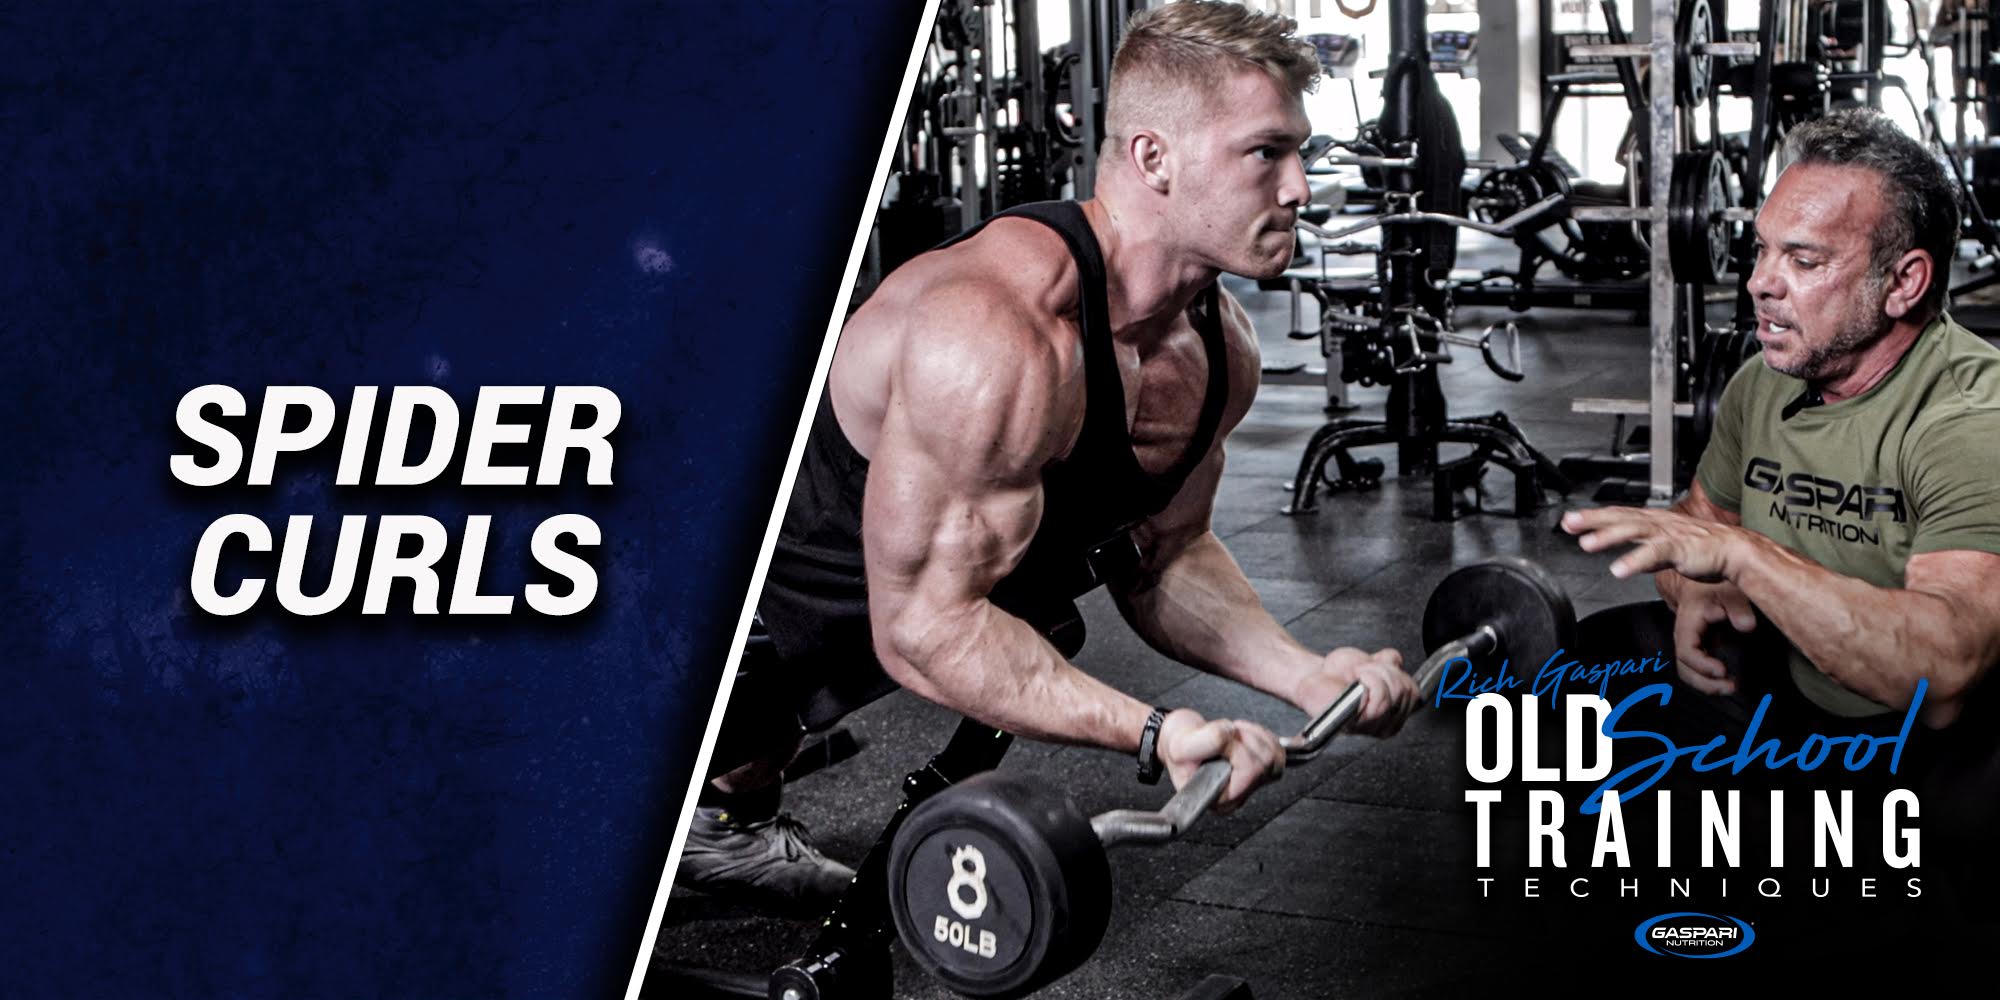
Meet Your New Biceps Secret Weapon: Spider Curls
If you’ve hit a plateau with your biceps training or your arms aren’t quite popping the way you want them to, it might be time to bring in a secret weapon—Spider Curls.
No, they’re not named after Spider-Man, but they do have superpower potential when it comes to biceps growth.
In this blog, we’ll break down everything you need to know about Spider Curls: what they are, how to do them properly, the benefits, variations, common mistakes, and advanced tips to make the most out of this killer isolation exercise.
What Are Spider Curls?
Spider curls are a bicep isolation exercise that targets the short head of the biceps. Performed while lying chest-down on an incline bench, the arms hang freely in front of the body—forcing your biceps to do all the work without help from your shoulders or momentum.
They’re called “Spider” curls because your body positioning resembles a spider clinging to a wall. Creepy name. Incredible results.
Muscles Worked in Spider Curls
While the focus is on the biceps brachii, particularly the short head, spider curls also work:
Brachialis – Adds width to the upper arms.
Forearms (brachioradialis) – Helps with grip and control.
Stabilizers in the shoulder – Keeps posture strict and tight.
Because the arms hang perpendicular to the floor, spider curls maintain constant tension on the biceps—something traditional curls often fail to do.
Why Spider Curls Are So Effective
Here’s why Spider Curls are loved by bodybuilders and gym rats alike:
1. Strict Isolation
Your back is supported by the bench, and your elbows are forward, eliminating momentum. This forces your biceps to contract harder and longer.
2. Peak Contraction
The setup allows for full range of motion and a strong squeeze at the top of the movement, crucial for building the biceps peak.
3. Constant Tension
Unlike standing curls, there’s no “rest spot” during a spider curl. This burns the muscle more and triggers hypertrophy.
4. Minimal Cheating
It’s very hard to swing or recruit other muscles. If you’re someone who tends to use your shoulders during curls, this fixes that.
How to Do Spider Curls (Step-by-Step)
Equipment Needed:
Incline bench (set to 45-60 degrees)
EZ-bar, straight barbell, or dumbbells
Setup:
Set the incline bench to about 45 degrees.
Lie face down with your chest supported and arms hanging over the front.
Grab your weights with an underhand grip (supinated).
Execution:
Start with arms fully extended and biceps stretched.
Curl the weight slowly toward your shoulders, keeping elbows pointed down.
Pause and squeeze the biceps at the top for 1–2 seconds.
Lower the weight in a controlled motion.
Repeat for 8–12 reps.
Spider Curls vs Preacher Curls
Feature
Spider Curls
Preacher Curls
Arm Position
Hanging vertically
Rested on a slanted pad
Tension
Constant throughout the movement
Reduced tension at bottom
Muscle Focus
More on short head of biceps
Balanced bicep activation
Equipment Needed
Incline bench + weights
Preacher curl bench + weights
Momentum Involvement
Almost zero
Slight possibility at start
Both are amazing, but Spider Curls give a more intense stretch and contraction. Add both to your routine for complete development.
Variations to Try
Spider curls aren’t one-size-fits-all. Here are some killer variations:
Dumbbell Spider Curls
Allows each arm to work independently, correcting muscle imbalances and enhancing range of motion.
EZ-Bar Spider Curls
Easier on the wrists and better grip for most people. Ideal for those with wrist pain.
Reverse Spider Curls
Use an overhand grip to target your brachialis and forearms. Great for full-arm development.
Cable Spider Curls
Attach a low pulley cable behind the bench for constant resistance. Burns like fire—in a good way.
Common Mistakes to Avoid
Even though Spider Curls are a strict movement, some people still manage to do them wrong. Watch out for these mistakes:
Using Momentum
If you're swinging or jerking the weight, you’re missing the point of Spider Curls. Drop the weight and slow down.
Elbows Flaring Out
Keep them tight and pointed toward the floor throughout the rep. This ensures max bicep engagement.
Not Fully Extending
Partial reps cheat your gains. Let your arms fully extend at the bottom for a good stretch.
Rushing the Reps
Spider Curls are about time under tension. Control each movement—especially the eccentric (lowering) phase.
Pro Tips to Maximize Your Gains
Use a tempo – Try 2 seconds up, 1 second squeeze, and 3 seconds down. You’ll feel every fiber firing.
Add intensity techniques – Try drop sets or rest-pause sets once you’re comfortable with the movement.
Train them at the start or end – Some people use Spider Curls to pre-exhaust the biceps before heavy lifts; others finish their workout with them for a final pump. Experiment and see what works best for you.
Stretch after – Spider Curls shorten the muscle a lot. Give your biceps a solid stretch after your session to aid recovery and growth.
When Should You Do Spider Curls?
Spider Curls are perfect for:
Arm Days – Add them to target biceps specifically.
Push/Pull Splits – Use on pull days for biceps burnout.
Hypertrophy Programs – Great when volume and time-under-tension matter.
Train them 1–2x per week for best results, ideally after your compound pulling exercises like pull-ups or rows.
The Bottom Line: Spider Curls for Serious Arm Growth
Spider Curls may look simple, but they deliver serious results. If you want peakier, stronger, more defined biceps, they deserve a permanent spot in your training plan.
They isolate the muscle, minimize cheating, and maximize contraction—all of which are essential for sculpting arms that actually turn heads.
So next time you’re hitting biceps, skip the ego curls and go full spider mode. Your sleeves might not thank you, but your biceps definitely will.
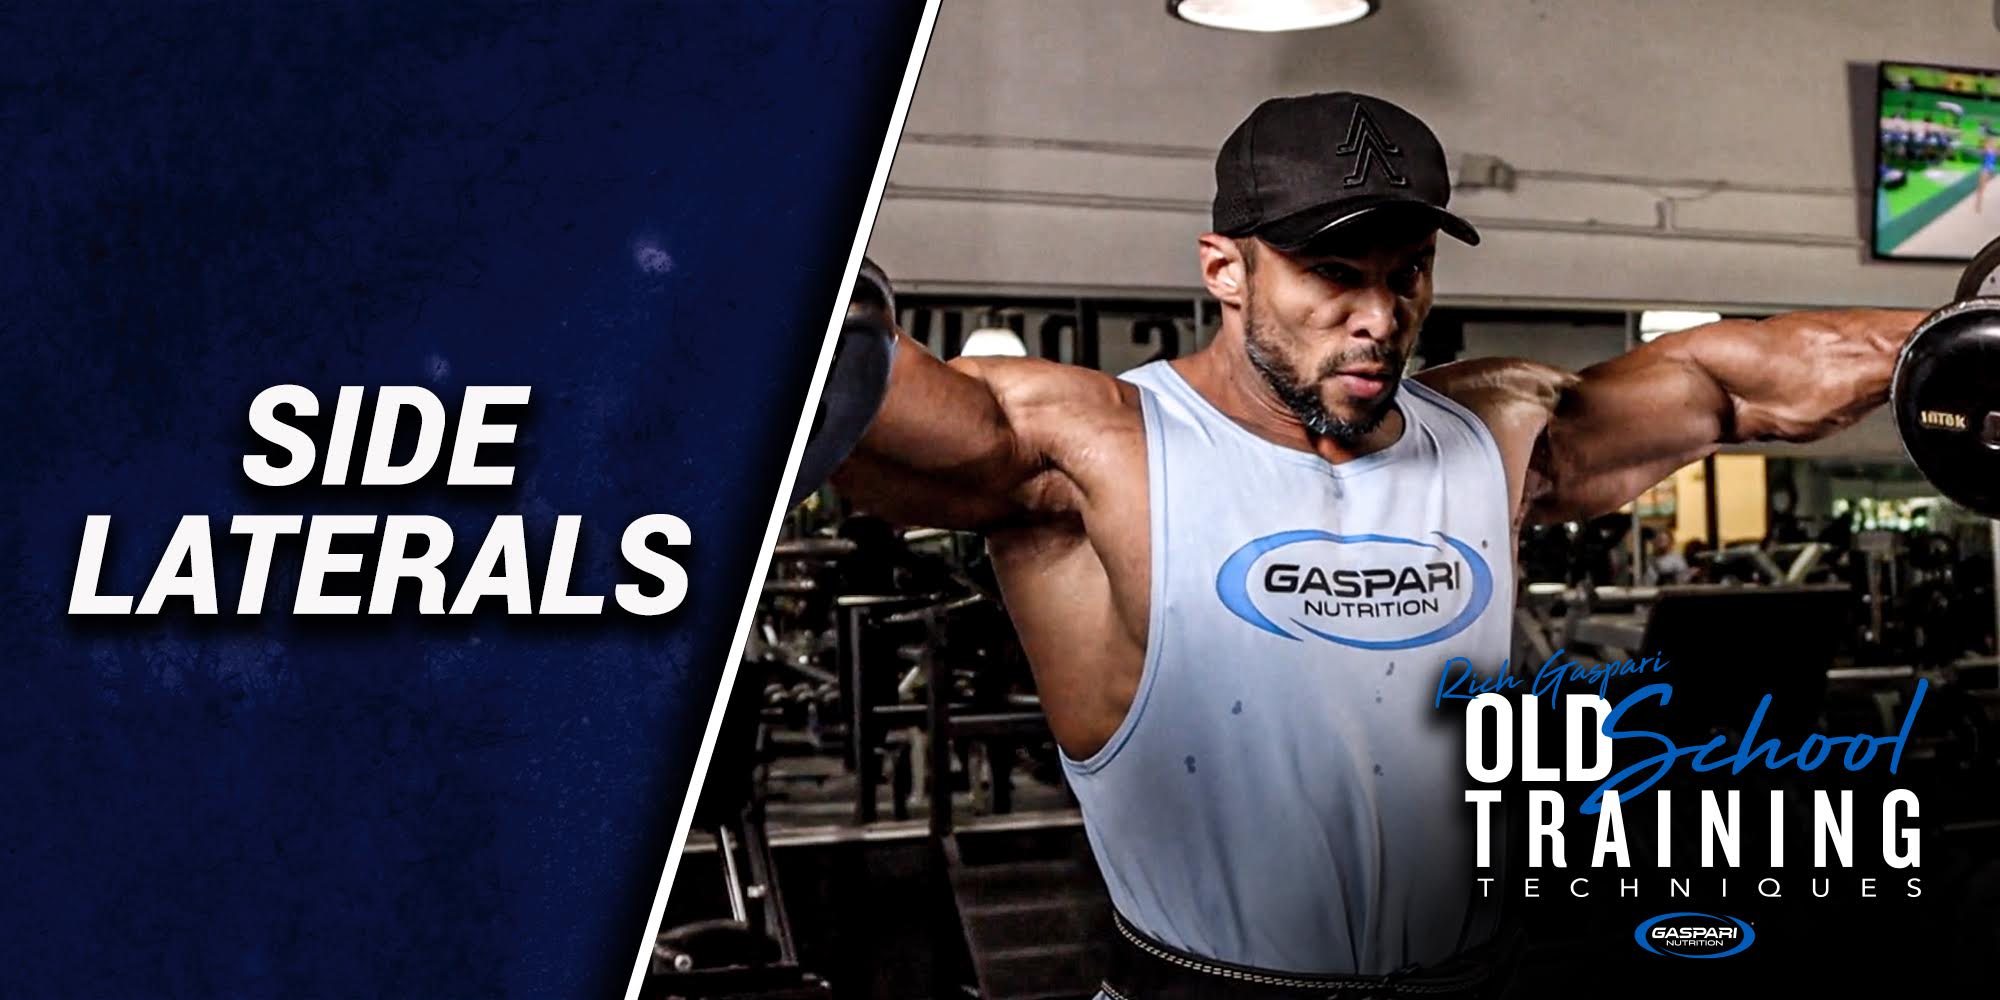
Pro Tips for Faster Shoulder Gains
If you're looking to build those coveted broad, round shoulders, side lateral raises—often just called side laterals—should be a staple in your workout routine. They may look simple, but when done correctly, they are one of the most effective exercises to target the medial (middle) deltoids, which give the shoulders that wide and capped appearance.
In this detailed guide, we’ll cover everything you need to know about side laterals, including form, benefits, variations, mistakes to avoid, and tips for faster results.
What Are Side Laterals?
Side laterals are an isolation exercise that primarily targets the lateral head of the deltoid muscle. This move involves lifting your arms out to the sides with a slight bend in the elbows, typically using dumbbells, cables, or resistance bands.
It’s a go-to shoulder movement for:
Bodybuilders
Athletes
Fitness enthusiasts
Anyone aiming for aesthetic or functional shoulder strength
Muscles Worked
While the main target is the lateral deltoid, side laterals also engage:
Anterior deltoid (front delts)
Posterior deltoid (rear delts) to a lesser extent
Trapezius muscles for stability
Supraspinatus (part of the rotator cuff)
Why Side Laterals Matter?
Here’s why you should definitely include this move in your shoulder day:
Build Wider Shoulders
Side laterals target the lateral deltoids, which are responsible for shoulder width. If you want that V-tapered physique, this is the move to master.
Improved Shoulder Definition
Consistent lateral raises add that 3D pop to your delts, making them more defined and aesthetically pleasing.
Enhance Shoulder Strength & Stability
Although it's more of a shaping movement, side laterals contribute to shoulder endurance and coordination, especially important for athletes.
Better Posture
Strong deltoids help keep the shoulders pulled back and chest up, improving posture and reducing risk of injury.
How to Perform Side Laterals (Dumbbell Version)
Starting Position:
Stand tall with feet shoulder-width apart.
Hold a dumbbell in each hand, palms facing inward (neutral grip).
Let your arms hang naturally by your sides with a slight bend in the elbows.
Execution:
Lift both arms out to the sides until they reach shoulder height.
Keep a slight bend in the elbows; don’t straighten your arms.
Pause at the top, then slowly lower the weights back to the starting position.
Control the movement throughout—no swinging or jerking.
Breathing:
Exhale as you lift.
Inhale as you lower the weights.
Pro Tips for Better Results
Go light, feel the burn: It's better to use lighter dumbbells with perfect form than heavy ones that force you to cheat.
Keep tension on the delts: Don’t let the arms rest at the bottom—this maintains constant tension.
Use slow and controlled motion: A 2–1–2 tempo (2 seconds up, 1 pause, 2 seconds down) works great.
Don’t shrug: This recruits the traps. Keep shoulders down and relaxed to target the delts.
Common Mistakes to Avoid
Using Momentum
Swinging the body or jerking the weights takes tension off the delts. Focus on controlled reps.
Going Too Heavy
Side laterals are not a power lift. If you're not feeling it in your delts, you're likely lifting too much.
Over-shrugging
This engages your traps more than delts. Keep shoulders down and relaxed throughout the movement.
Straight Arms
Locking out your elbows puts unnecessary strain on your joints. Maintain a soft bend.
Raising Too High
Going beyond shoulder height can stress the rotator cuff. Stop at shoulder level.
Best Variations of Side Laterals
Switching things up can help avoid plateaus and keep the movement challenging. Try these effective variations:
Cable Lateral Raises
Provides constant tension throughout the range of motion.
Great for hypertrophy and muscle mind-connection.
Seated Side Laterals
Minimizes momentum and forces strict form.
Perfect for isolating the delts.
Incline Side Laterals
Performed on an incline bench facing down.
Hits the delts from a different angle.
Resistance Band Lateral Raises
Travel-friendly option.
Good for warm-ups or high-rep burnout sets.
When and How Often to Do Them
You can include side lateral raises in your shoulder or upper body day. Here’s a sample guide:
Training Goal
Sets
Reps
Rest
Muscle Building
3-4
10-15
30-60s
Muscle Endurance
3-5
15-20
20-30s
Strength Maintenance
3
8-12
60-90s
Nutrition Tip for Shoulder Gains
Don’t forget—muscles grow in the kitchen too. For building strong shoulders:
Get enough protein: Aim for 1.6–2.2g/kg of body weight.
Stay hydrated: Dehydration can affect shoulder mobility.
Carbs fuel your workouts: Eat enough to power through high-rep sets.
The Secret to Sculpted, Boulder Shoulders
Side laterals may look like a basic move, but they pack a punch when it comes to sculpting your shoulders. Whether you're chasing the aesthetics of boulder shoulders or aiming to improve strength and posture, side laterals belong in your workout arsenal.
Just remember—form is everything. Slow it down, keep the tension on your delts, and stay consistent. In a few weeks, you’ll start seeing those round caps forming and your T-shirts fitting a little snugger in the best way possible.
Frequently Asked Questions
Q1: Can beginners do side laterals?
Yes! Just start with light weights (2–5 lbs) and focus on form.
Q2: Are side laterals enough for shoulder development?
They’re essential, but not enough alone. Combine with presses and rear delt work.
Q3: Can I do them every day?
No. Your muscles need rest to grow. 1–2 times per week is sufficient.
Q4: Dumbbells vs cables—what’s better?
Both are effective. Dumbbells are easy and accessible, cables provide more tension and control.
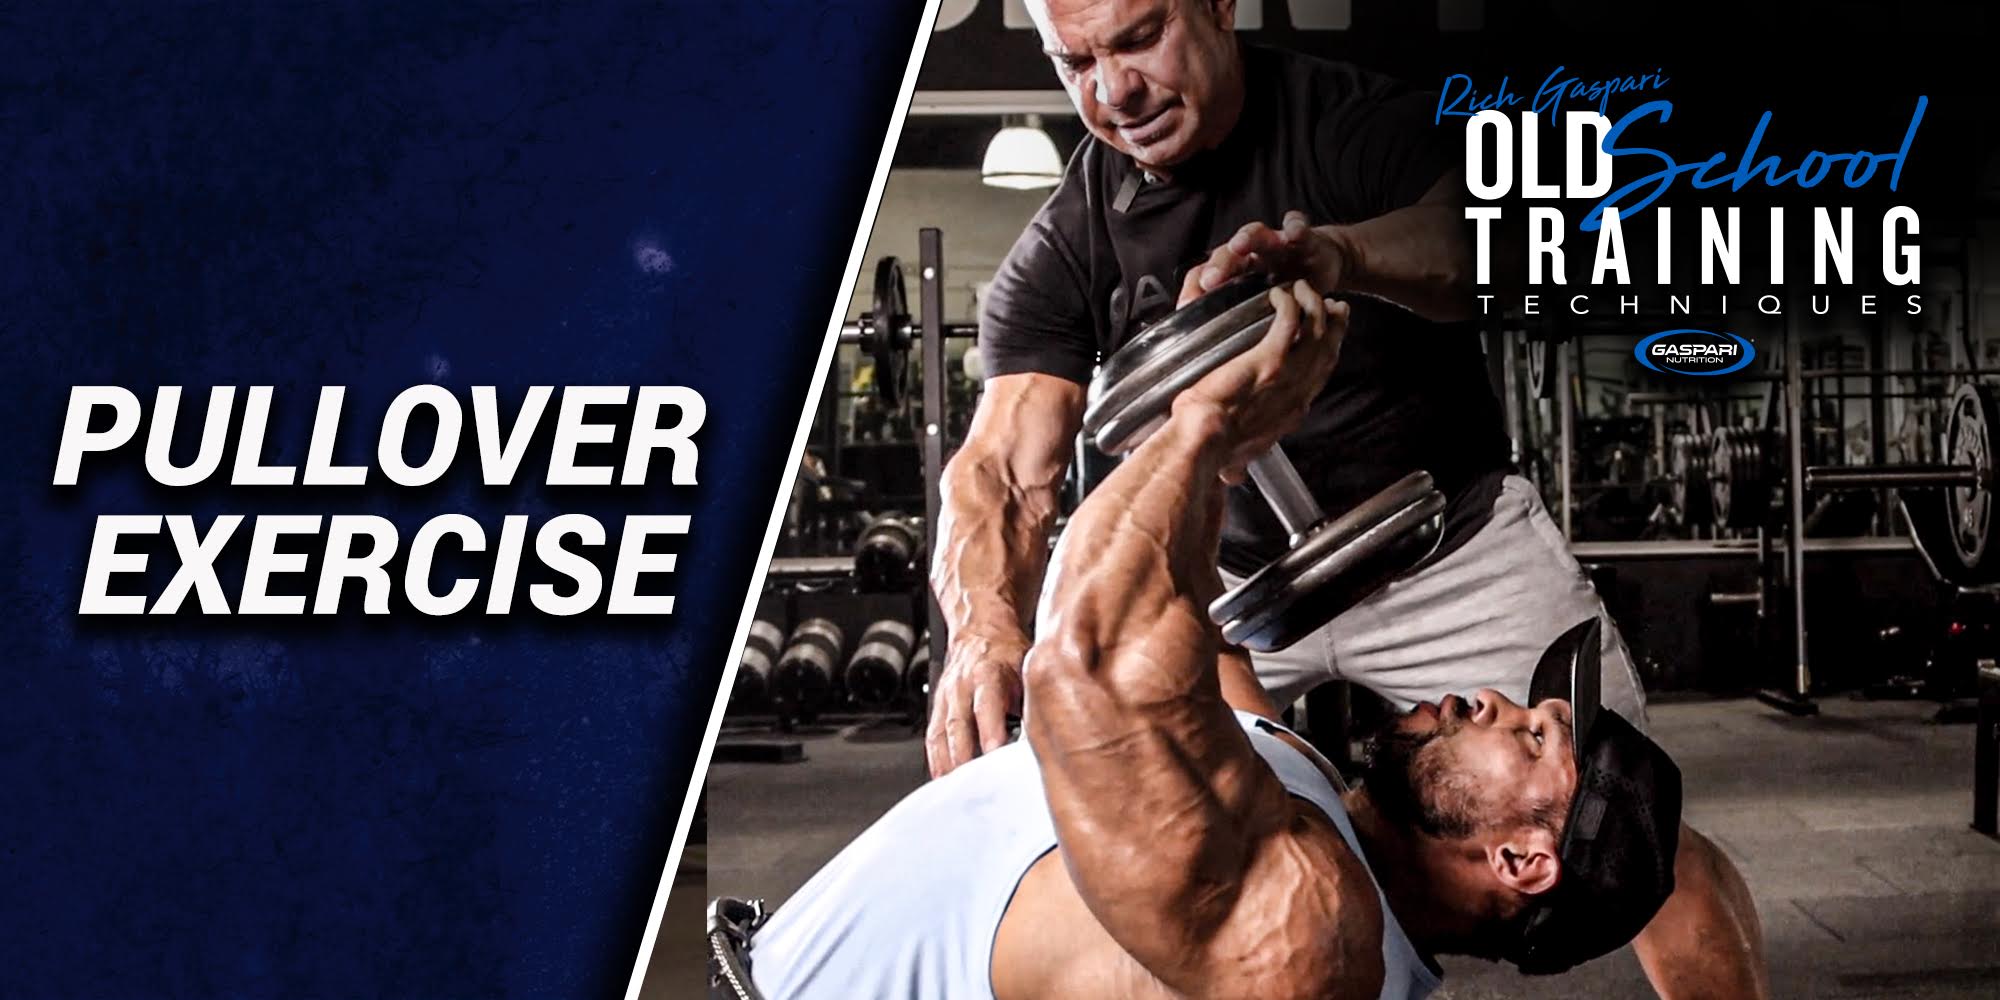
Rich Gaspari reminds us all of how effective a good, old-fashioned dumbbell pullover can be!
By leaning down on a bench and utilizing a dumbbell instead of the newer machine, you are hitting different parts of your lats in an intense way, Let us know in the comments when the last time you did this technique was!
The Ultimate Guide to Maximizing Your Workout
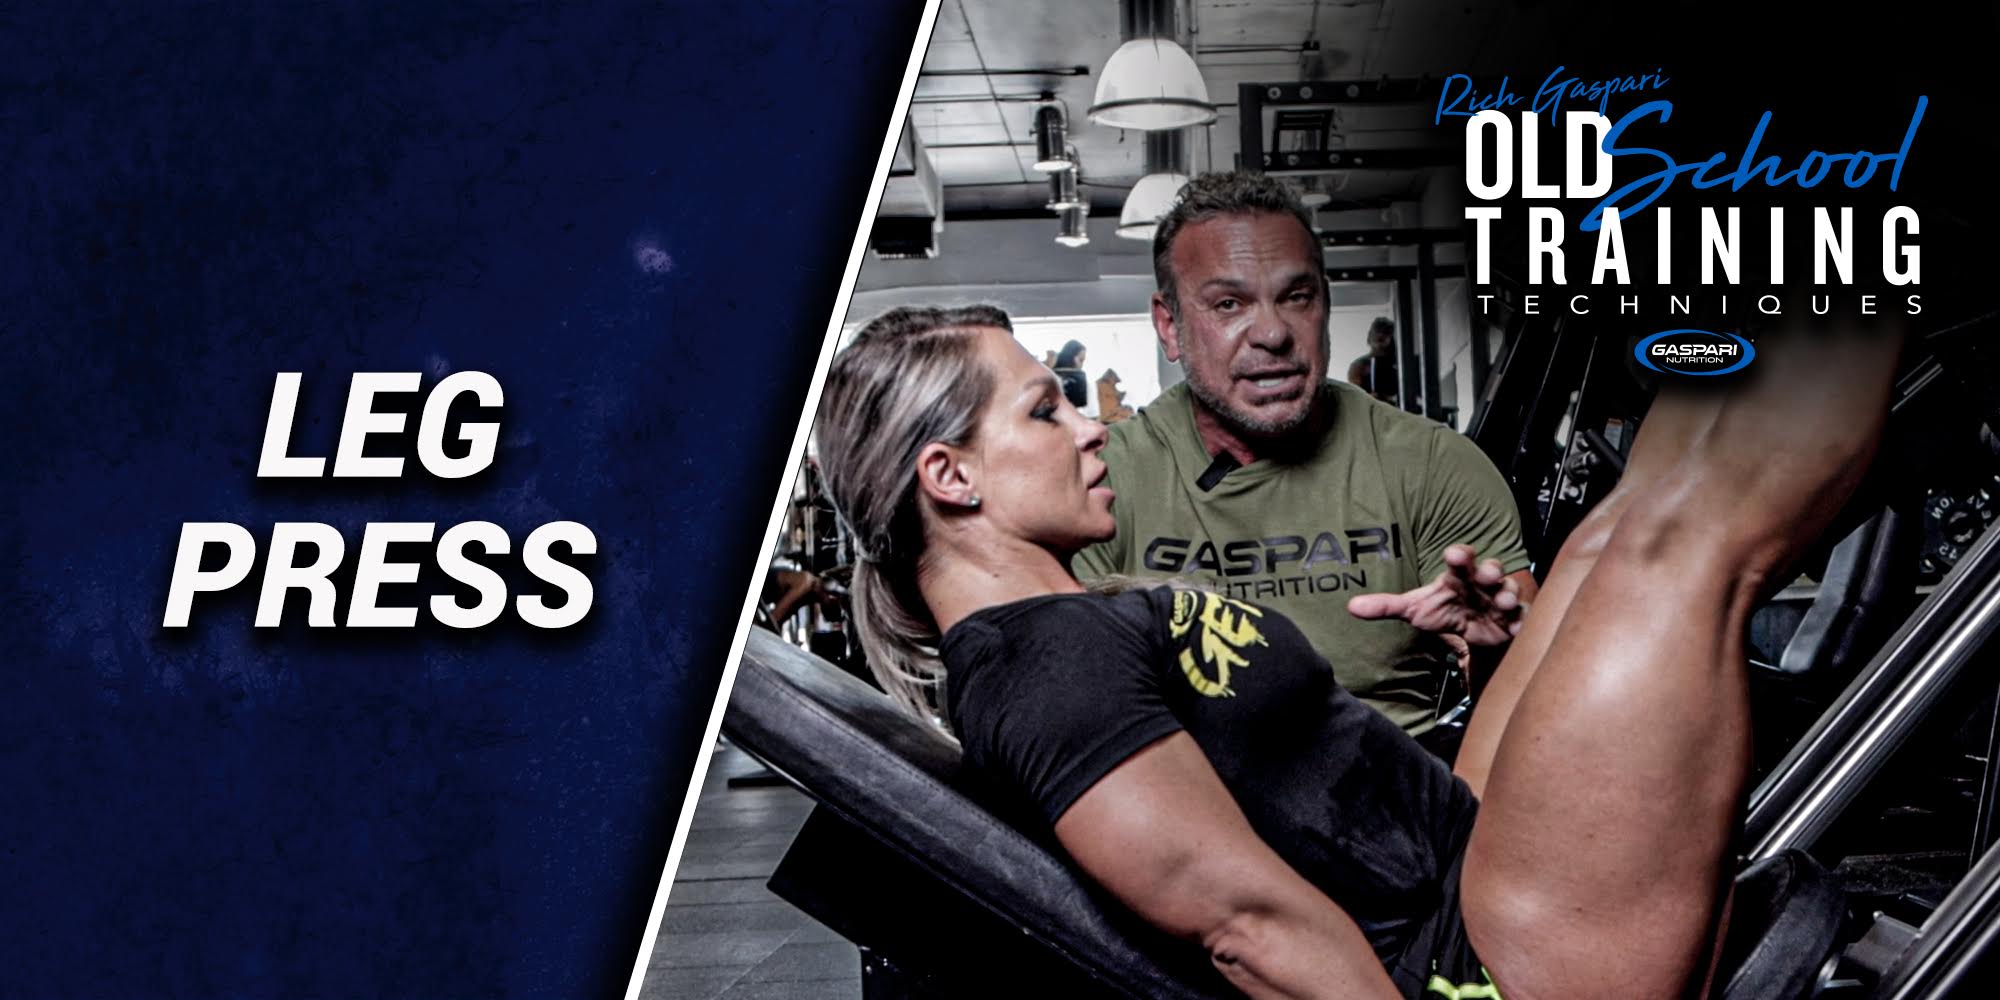
The Leg Press is one of the most effective lower body exercises, targeting your quadriceps, hamstrings, glutes, and calves. While it may seem straightforward, subtle changes in foot positioning can dramatically shift muscle activation, allowing you to customize your workout for different results.
Fitness icons Rich Gaspari and Aliona demonstrate how classic Leg Press movements can be modified to emphasize specific muscles. This guide will help you understand how to maximize the benefits of the Leg Press by adjusting your foot placement, ensuring that every rep counts.
The Benefits of the Leg Press
Before diving into foot positioning, let’s explore why the Leg Press is a must-have in your leg day routine:
Strengthens Lower Body Muscles
Engages quads, hamstrings, and glutes for a powerful lower body.
Reduces Lower Back Stress
Unlike squats, the Leg Press allows you to work your legs with less spinal load.
Enhances Muscle Growth
Adjusting foot placement helps target muscles more effectively, leading to balanced leg development.
Ideal for Beginners and Advanced Lifters
Provides a controlled movement that’s safer than free-weight exercises like squats.
How Foot Placement Affects Your Leg Press Workout
1. Standard Foot Placement: Balanced Muscle Engagement
The traditional Leg Press stance involves placing your feet shoulder-width apart in the middle of the footplate. This engages the quadriceps, hamstrings, and glutes evenly, making it ideal for overall leg development.
Tip: Keep your knees aligned with your toes and avoid locking your knees at the top of the movement.
2. High Foot Placement: Glute and Hamstring Focus
Placing your feet higher on the footplate shifts emphasis to the hamstrings and glutes. This variation is great for building posterior chain strength and developing a more rounded, powerful lower body.
Benefits:
Reduces stress on the knees
Targets the back of the legs more than the quads
Helps strengthen hip extensors
3. Low Foot Placement: Quad-Dominant Press
If you want to build strong quads, a low foot placement is your go-to technique. By positioning your feet lower on the plate, your quadriceps bear more of the load, giving you an intense burn in the front of your thighs.
Key Considerations:
This position increases knee flexion, so avoid it if you have knee pain.
Best for hypertrophy (muscle growth) in the quadriceps.
4. Wide Stance: Inner Thigh and Glute Activation
A wider foot stance targets the inner thighs (adductors) and glutes more effectively. If your goal is to improve overall leg thickness and strength, this is a great addition to your Leg Press routine.
Why It Works:
Increases inner thigh activation
Helps improve hip mobility and strength
Great for developing a balanced lower body
5. Narrow Stance: Outer Quad Emphasis
A close foot placement shifts the focus to the outer quads (vastus lateralis). This technique helps build that coveted “sweep” in the quads, enhancing leg aesthetics.
Best Practices:
Keep feet close together but maintain proper knee alignment.
Perform slow, controlled reps for maximum engagement.
Common Mistakes to Avoid on the Leg Press
Locking Out Your Knees – This can put unnecessary stress on your joints and increase injury risk.
Lifting Your Hips Off the Seat – Keep your lower back and hips firmly pressed against the seat to avoid spinal strain.
Using Too Much Weight – Focus on proper form and control rather than loading the machine excessively.
Feet Too Low or Too High – Extreme foot placements can cause knee discomfort or limit range of motion.
How to Incorporate the Leg Press into Your Workout Routine
For best results, integrate the Leg Press into your leg day routine with different variations:
Beginner Routine:
Standard Leg Press: 3 sets of 10-12 reps
Wide Stance Leg Press: 3 sets of 12 reps
Narrow Stance Leg Press: 3 sets of 12 reps
Advanced Routine:
High Foot Leg Press: 4 sets of 8-10 reps
Low Foot Leg Press: 4 sets of 10 reps
Wide Stance Leg Press: 4 sets of 12 reps
Drop Set: Reduce weight and perform 12 reps until failure
Leg Press vs. Squats: Which One is Better?
Both the Leg Press and squats are effective lower body exercises, but they serve different purposes:
Feature
Leg Press
Squats
Back Support
Yes
No
Quadriceps Activation
High
High
Glute & Hamstring Engagement
Moderate
High
Core Activation
Low
High
Risk of Lower Back Injury
Low
Higher
Which Leg Press Variation is Best for You?
Ultimately, your foot placement should match your training goals. Rich Gaspari and Aliona showcase how subtle variations can lead to different results. If you want well-rounded leg development, incorporate multiple stances into your training.
What’s Your Favorite Leg Press Foot Position?
Now that you understand the benefits of different Leg Press techniques, which foot positioning do you prefer? Try experimenting with different placements and see what works best for you.
Let us know your favorite variation in the comments below!
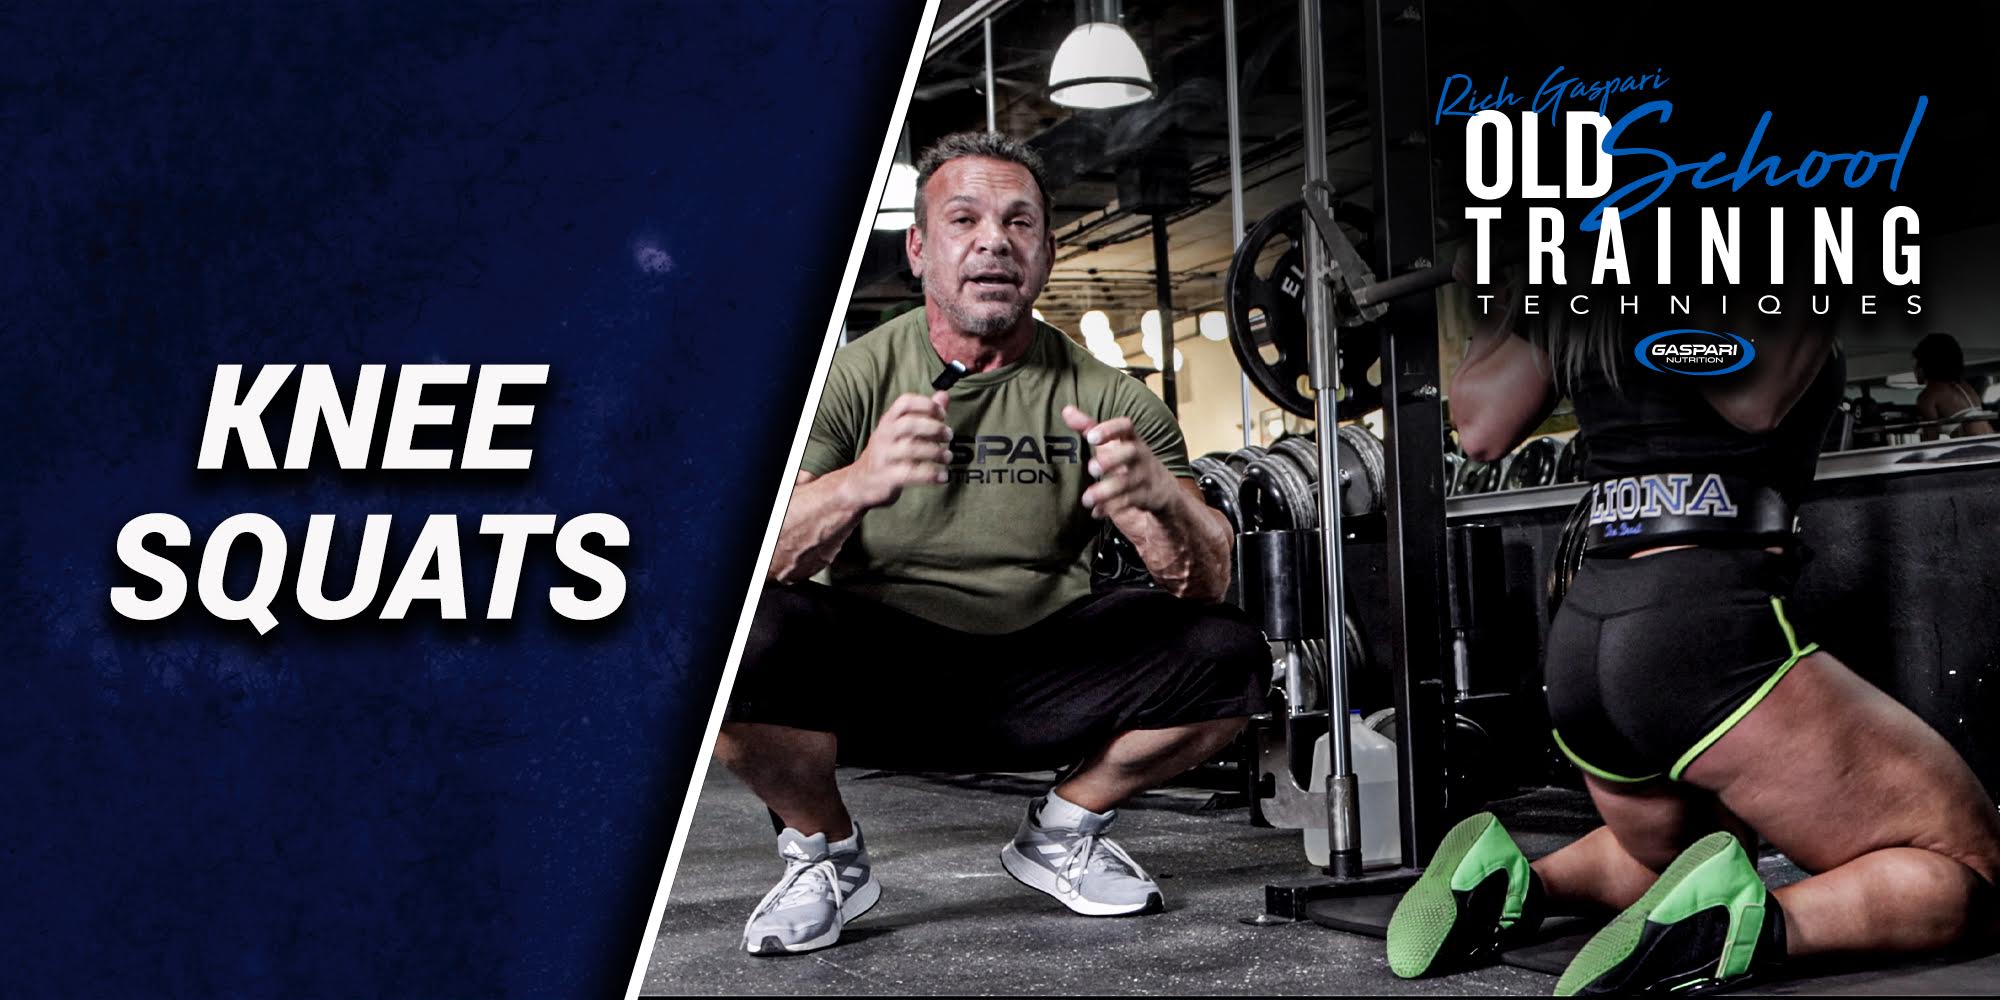
Rich Gaspari and #TeamGaspari Elite Athlete Aliona show us a twist on a classic piece of equipment. Everyone knows and loves the squat rack, but Rich shows here a different way to use it to isolate the glute muscles
Give it a try in your next workout and see the difference!
Rich Gaspari and Mr Olympia competitor Zeek Andrews demonstrate a great set of exercises to help build up the delts.
Supersetting Dumbbell Upright Rows with Front Raises is a great way to add size and strength to the delt muscles.
Rich Gaspari and Aliona demonstrate how to use a cable machine to help isolate the glute muscles in this exercise. By using a cable machine set to the lowest point, you can attach the cable to your ankle and help isolate the glute muscles for each leg individually.
Try it out for yourself and feel the difference!
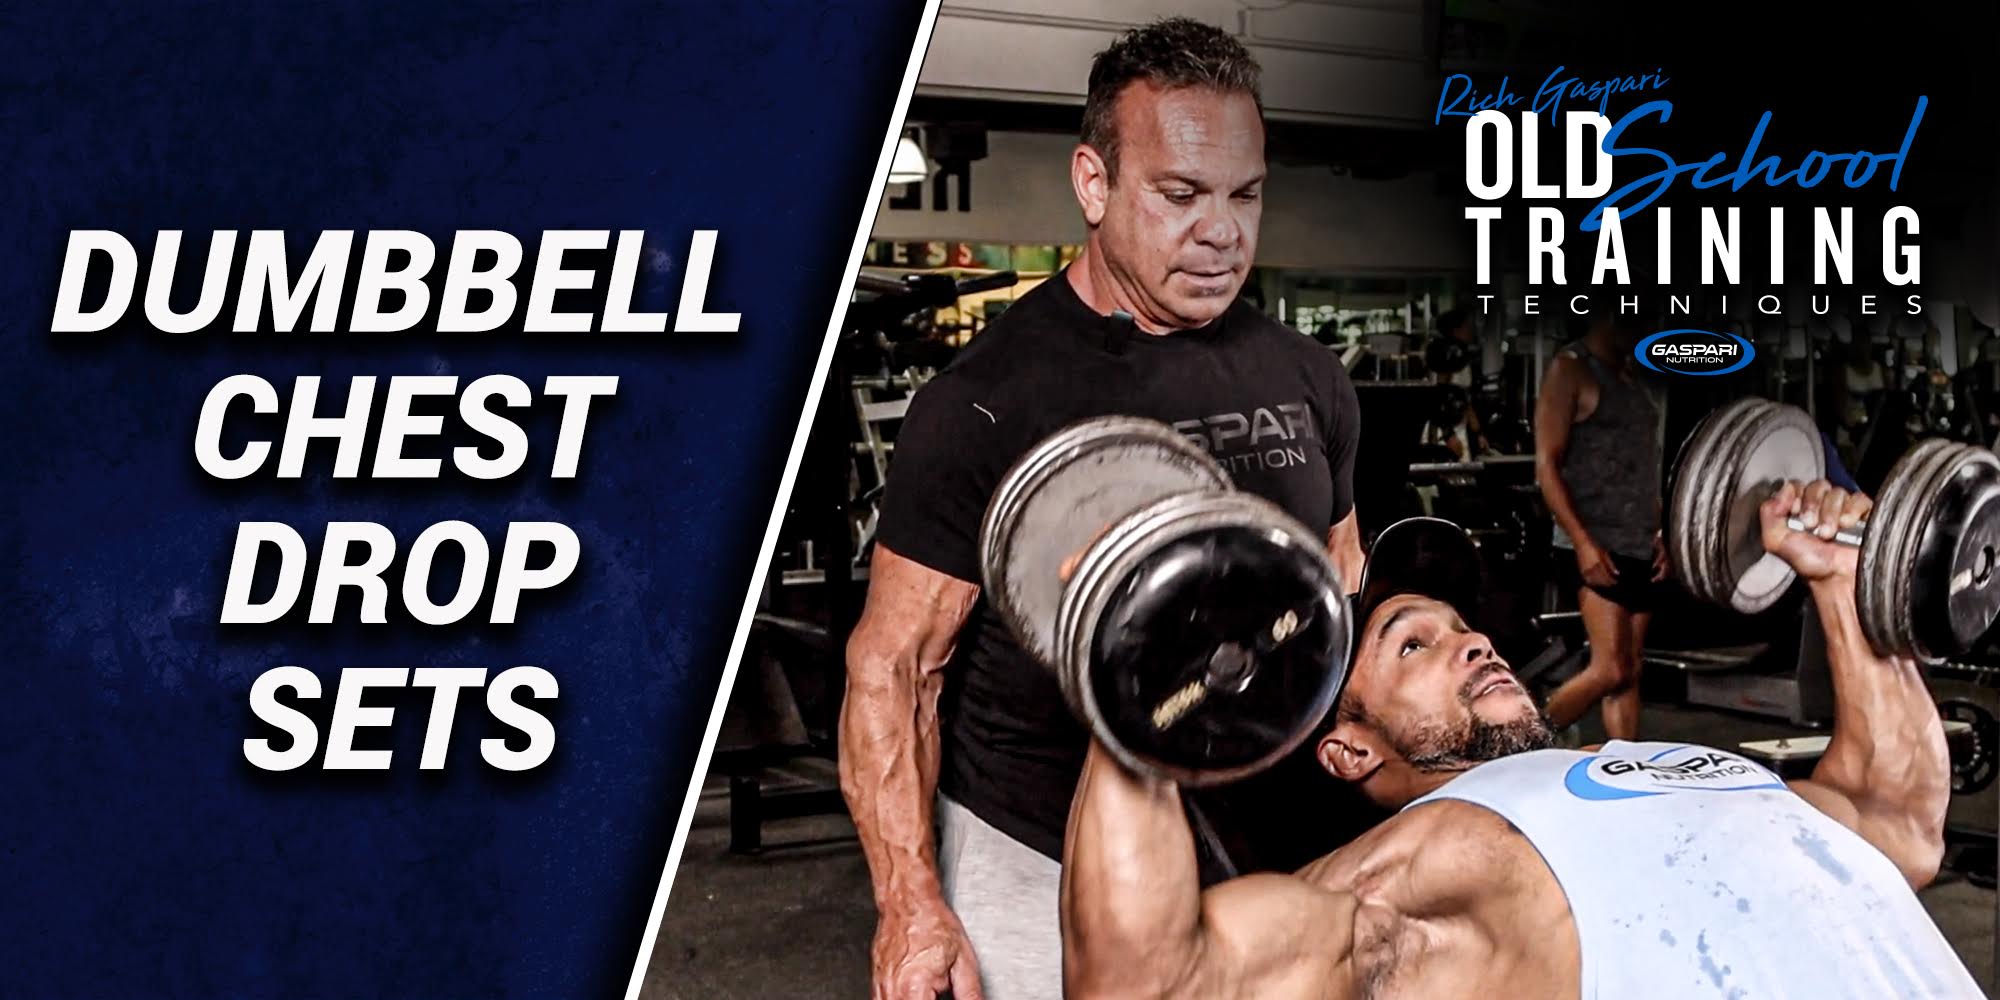
Rich Gaspari explains here the fundamentals of a drop set and how they can be incredibly beneficial to your workouts to reach maximum tension in the muscles.
He demonstrates with #TeamGaspari athlete Oswaldo how the pace of a drop set is very important, while showcasing a quick chest workout